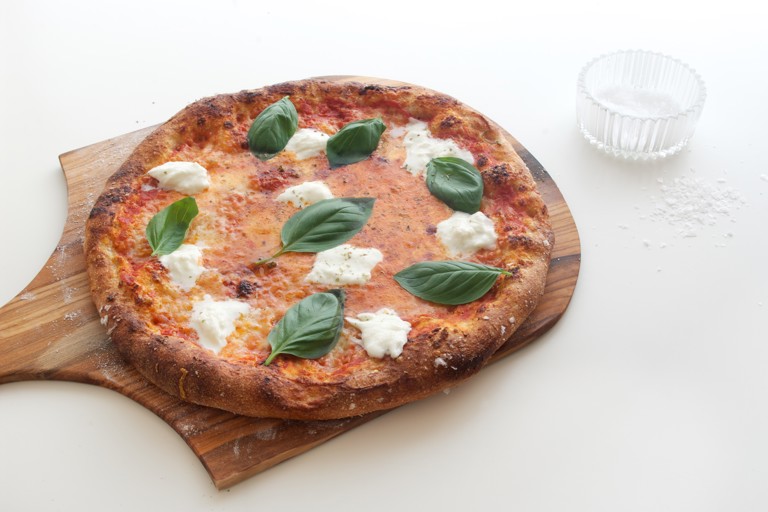
Perfect pizza

  • medium
  • Makes 6
  • 3 hours
Not yet rated

Making perfect pizza in a home oven takes patience and care, but your reward is truly remarkable pizza – the best you’ve ever tasted. Bubbly and browned, crispy and crunchy, it is packed with nutty flavour.

First published in 2016

I have dedicated much of my life to the pursuit of amazing pizza, that elusive delight. For something so simple, made of such few ingredients, the variety – and difference in quality – is staggering. I have eaten pizza all over the world, trained with master Roman pizza maker Gabriele Bonci and even run my own pizzeria. I have made pizza in every home oven I have ever had (and with my travel-happy life, that’s a lot of ovens), each oven with its own quirks, for good and for bad. This recipe is the result of that labour.

Ingredients

Metric

Imperial

Pizza dough

  • 600g of warm water
  • 15g of fresh yeast, or 1 level teaspoon dry yeast
  • 370g of strong white bread flour
  • 370g of strong wholemeal flour
  • 1 1/2 tsp vital wheat gluten
  • 2 tsp honey, (lightly heaped)
  • 4 tsp flaky sea salt, plus more for sprinkling
  • extra virgin olive oil, for drizzling
  • semolina, or whole wheat flour for shaping

Pizza sauce

  • 400g of canned plum tomatoes, (preferably organic)
  • 3 garlic cloves, crushed
  • 1 handful of basil leaves
  • 1 tsp dried oregano
  • 1 tsp flaky sea salt
  • freshly ground black pepper
  • lemon juice, 1 squeeze
  • 1 tbsp of extra virgin olive oil

Margherita toppings

Method

1
Begin by making the pizza dough. I used a Thermomix to make this dough, but my recommended machine is a stand mixer. I’ve tried both and the stand mixer adds more air, meaning a puffier dough with better bubbles. You can also knead by hand, but be prepared to really go for it for 10–15 minutes
2
Add the lukewarm water and yeast to your chosen machine or a large bowl and mix to combine. Add the flours, gluten and honey and mix only so all the ingredients are blended. Rest for 5 minutes to allow the gluten strands time to strengthen and bond
3
After resting, add the sea salt – salt inhibits the action of the yeast, so by adding it later the rise is improved. Knead for 8 minutes in your machine – or closer to 15 minutes if you’re doing it by hand
4
When the dough is ready, it should be elastic, with plenty of spring, and if using a machine it should have pulled away from the edges of the bowl. It should be tacky, but not very sticky – if yours is too wet, add a little flour and mix again for 30 seconds
5
Lightly flour a work surface with semolina or whole wheat flour and scrape the dough into the middle
6
A bench scraping tool is very useful here, but if you don’t have one do your best with some kind of spatula. Fold the right ‘side’ of the dough ball over
7
Then the top
8
Then the left
9
And finally the bottom. This process traps more air in the dough
10
Drizzle a little olive oil in a large bowl and nestle the dough in it, seam side down. Cover with clingfilm and leave somewhere warm for 45 minutes to rise. It will have risen by about a third
11
Tip the bowl over onto your lightly floured work surface so the dough falls out
12
Repeat the folding process above, folding each ‘side’ of the dough into the centre again. Leave to rise for a further 45 minutes. Until the dough has risen another third
13
When the dough is ready (about double the size you started with) tip the dough out again onto the work surface and cut into 6 pieces. This is easiest with a bench scraper, pressing straight down to cut
14
Pick up one dough ball and tuck all the sides under, stretching a gluten cloak around the ball making it smooth and taut
15
Turn the tightened dough ball over and squeeze all the seams together
16
Return the ball to the floured work surface, seam side down, and repeat with the rest of the dough balls, leaving enough space on your work surface for you to shape the pizzas later
17
Drizzle with a little olive oil to stop the surface drying out and sticking, then cover loosely with clingfilm for the final rising
18
Position your pizza stone on a rack about 10cm from the top of the oven, and set the oven to maximum temperature. In my oven that is 240°C/ gas mark 8, but I think my oven runs a little hotter – great for pizza, not so good for Victoria sponge
19
Leave the oven and the dough balls for a further hour, until airy and puffed. This is a good time to prepare all your toppings – make your sauce, chop the vegetables, slice the cheese, pluck the herbs. It’s good to have these all arranged around your pizza-making work surface, so they are ready when the dough is.
20
To make the pizza sauce, add all ingredients to a medium bowl and purée with an immersion blender. Set aside until ready to assemble the pizza
21
When the toppings are ready, the oven is piping hot and the dough is billowy, you are ready to shape. Dust your work surface again and transfer a dough ball to the centre. Press the middle of the dough ball to flatten it, gently stretching it out as you press
22
The trick here is to try and keep as many air bubbles in the dough as possible, so please put away that rolling pin. You want to stretch the dough, but not completely flatten it. Although the finished dough will be thin and look flat, it still has plenty of air in it to expand and lighten the texture as it bakes
23
The best way to stretch the dough is to use gravity – holding an edge with both hands and letting the dough hang or laying the dough over the back of your hands and moving in round. Pay attention to the gluten strands in the dough – you want to stretch the dough as much as possible, but not break it. Holes in dough are annoyingly hard to patch up
24
Keep stretching the base, thinner and thinner, until the base is about 25cm wide. Make sure you leave about 2cm around the edge, unpressed and unstretched, so it bakes into a raised crust
25
Dust a wooden pizza peel with semolina or whole wheat flour and gently transfer the shaped pizza, rearranging the shape as necessary. If you don’t have a pizza peel, the best substitute is a sturdy piece of cardboard
26
Add your toppings, leaving the puffed crust bare. For the pizza pictured I made a classic margarita using the tomato sauce, cow mozzarella and a little strong cheese for extra flavour (I used cheddar). Some buffalo mozzarella and fresh basil is added after baking. Remember not to overload the pizza or it will bake up soggy
27
Drizzle a little olive oil on the puffed crust and sprinkle with some flaky sea salt. Drizzle the whole thing with more olive oil
28
Give the pizza peel a little shake to make sure the pizza hasn’t stuck. If it has, try and get some flour under the sticky patch so it can slide freely
29
Carefully take the pizza stone out of the oven (watch out, it’s hot!) and lay on a heatproof surface, quickly closing the oven door. Touch the tip of the pizza peel to the far edge of the pizza stone and gently shake the pizza onto the stone. If you are very quick, you can arrange the pizza into a better shape in the first 20 seconds it sits on the stone, stretching it the full 30cm wide into a perfect circle – wait any longer and the crust will have set on the hot stone and the dough will tear
30
Bake for about 10 minutes – this will depend on the heat of your oven – until the crust is well browned and very crisp. It’s better that you overdo this pizza than underdo it. To remove from the oven, slide the peel under the pizza, giving the crust a tug with some tongs if it’s stuck
31
Transfer to baking paper or a cutting board and add any toppings that won’t benefit from the heat of the oven – in this case buffalo mozzarella and fresh basil. Let the pizza rest for a couple of minutes, so the melted cheese sets slightly, before cutting into pieces. Repeat for the rest of the pizzas
First published in 2016

Specialising in vegetarian food, Nancy has cooked her way around Europe and now writes full time for publications and her blog, Delicious from Scratch.

Get in touch

Please sign in or register to send a comment to Great British Chefs.

You may also like

Load more